This article will walk you through printing from your computer after you have installed the WEPA Print Drivers.
If you have not installed the print drivers, please go to Download wēpa Print App
These instructions are not for printing from the lab computers. For printing from lab computers, go to Print to wēpa from a Lab Computer
Windows Instructions
Open document within default software (Word, PowerPoint, Excel, etc.) and and click File>Print, select wēpa printer from drop down menu then click ‘Print’, typically in lower left corner of window. If not already signed in to the Windows Print App, a prompt will appear to login.
- A notification window will appear in the lower right toolbar near the wēpa icon indicating the document is uploading/uploaded.
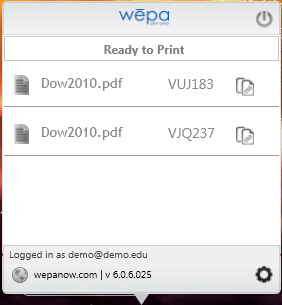
- Click the wēpa icon to see the full list of documents uploaded to the wēpa account with associated wēpa codes.
- Click the cog in the lower right corner for settings. Click ‘Submit Crash Report’ to email necessary logs to wēpa support if having issues uploading a document.
- Click ‘Got Feedback?’ to provide input on how to continue improving the Windows Print App.
| Anchor | ||||
|---|---|---|---|---|
|
Mac OS X Instructions
Open document within default software (Word, PowerPoint, Excel, etc.) and click File>Print, select wēpa printer from drop down menu then click ‘Print’, typically in lower left corner of window. If not already signed in to the Windows Print App, a prompt will appear to login.
- The printer icon will appear in lower Mac toolbar indicating the document is being processed. When it disappers, a notification window will appear in the top right MenuBar near the wēpa icon indicating the document is uploading/uploaded.
- Click the wēpa icon to see the full list of documents uploaded to the wēpa account with associated wēpa codes.
| Info | ||
|---|---|---|
| ||
Prices - Black and white (monochrome)
Prices - Color
|


