/
Installing wēpa Print to Cloud Drivers
Installing wēpa Print to Cloud Drivers
- Former user (Deleted)
- Ram Kumar Reddy Tamanampudi
- Heather Ulrich
Owned by Former user (Deleted)
w-To install the wēpa Print App to your computer for Windows and Mac OS X
If you haven't already, you will need to log into wēpanow.com to download the printer drivers. Click here for Login & Download Instructions
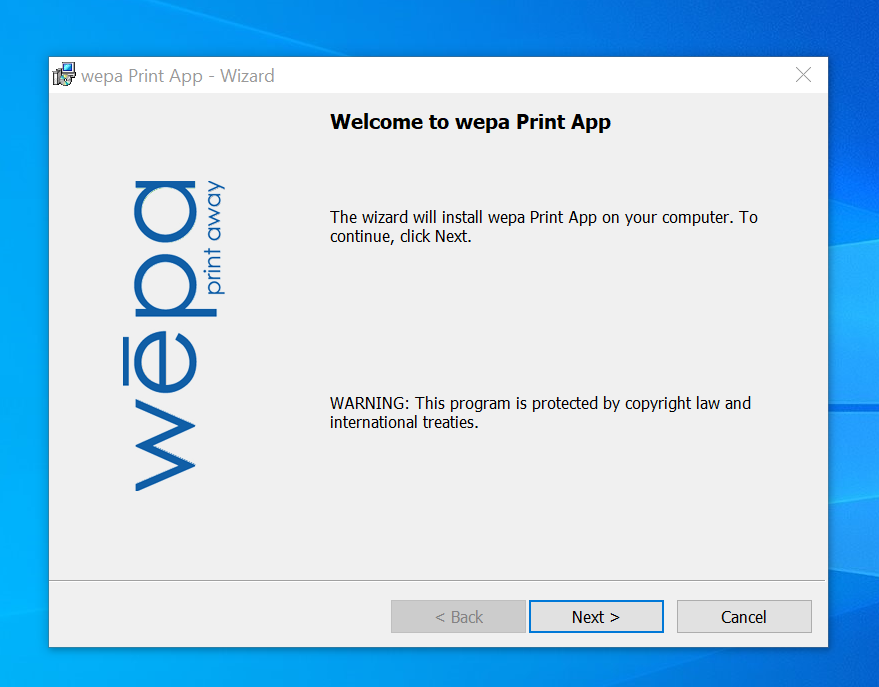
Windows Instructions
- Open the .msi file to begin installation. Software Requirement – .NET 4.5 framework – a prompt will appear to install if not already.
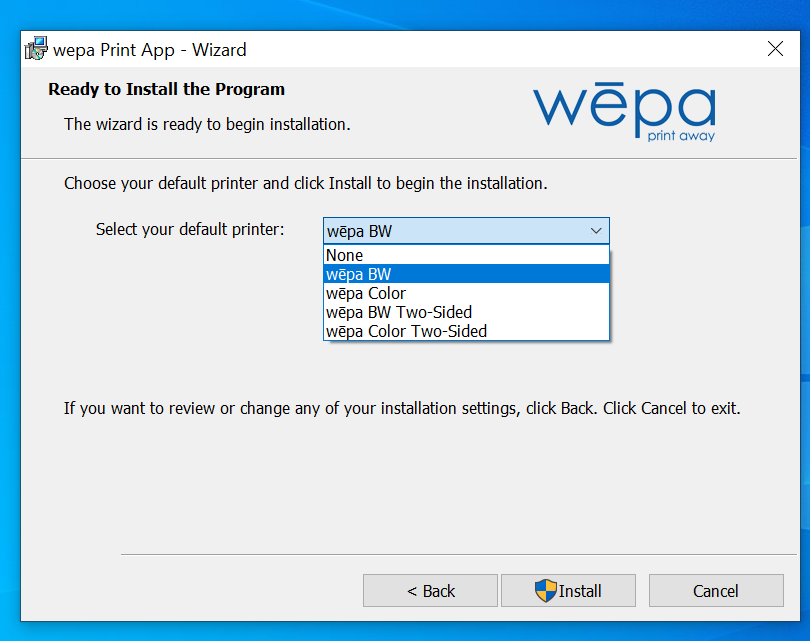
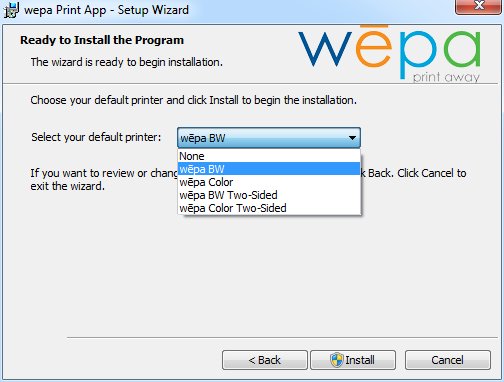
- Select the default printer from drop down menu then ‘Install’. Two-sided printer will print documents on two sides by default. Choose None to retain your current default printer
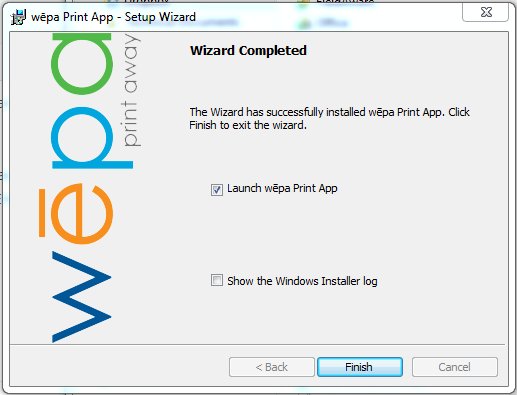
- After the installation completes, press Finish to launch the Windows Print App.
Important: Must launch the app the first time to complete the configuration, and this needs to be done with administrative rights.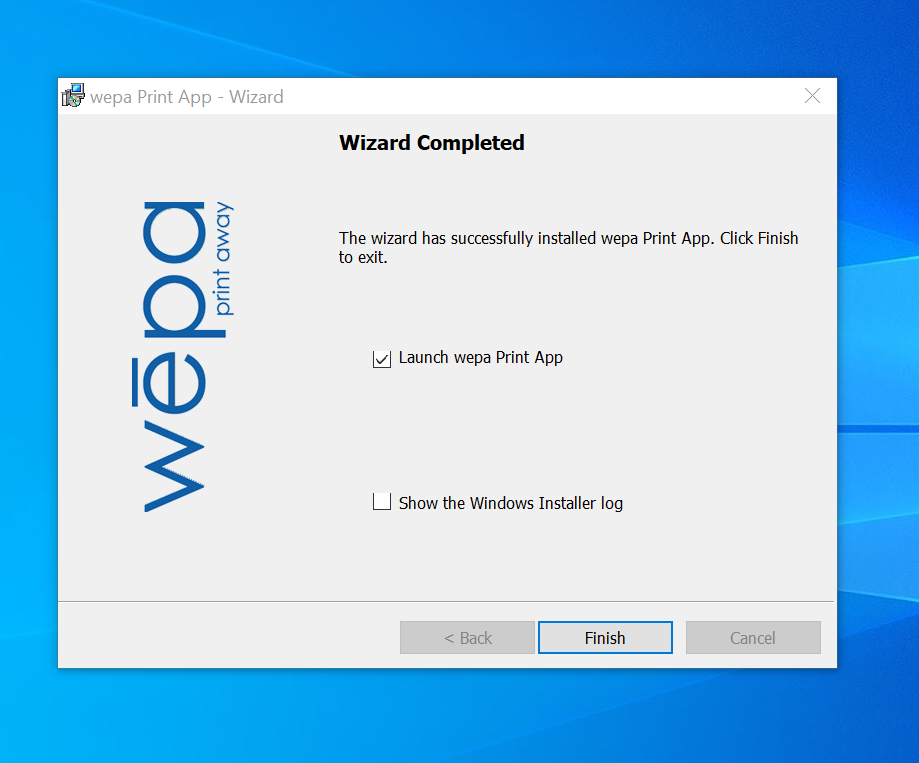
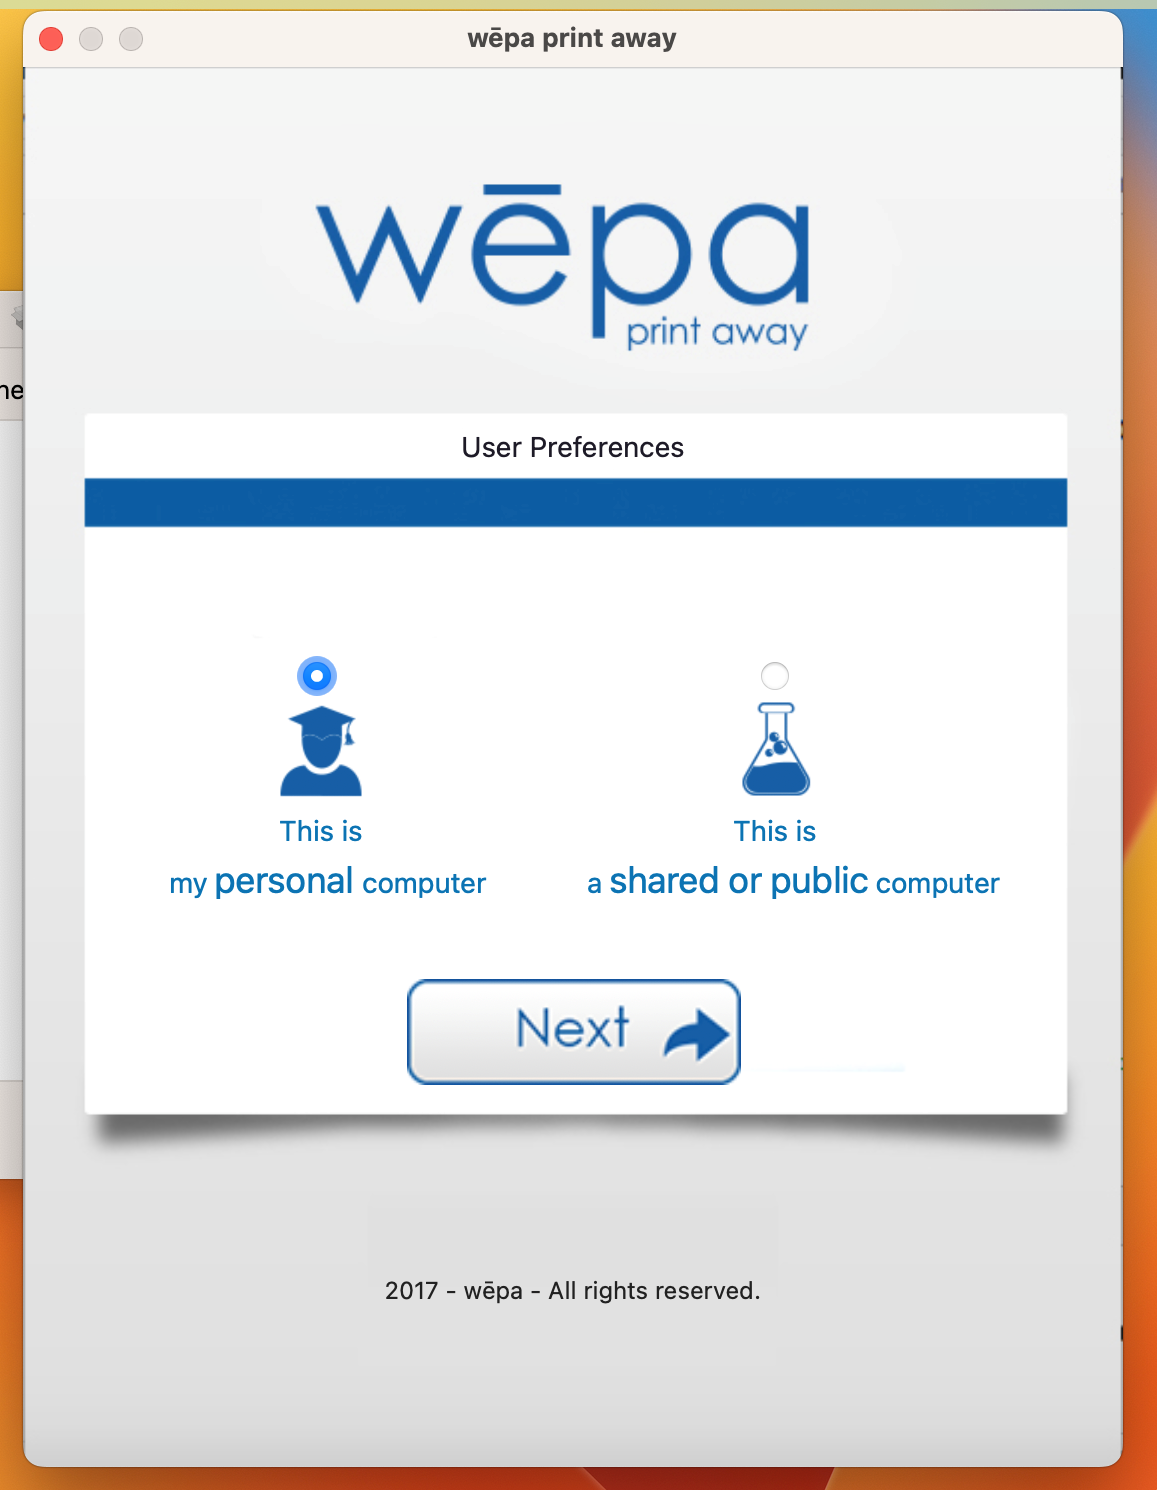
- Select ‘Student, then click ‘Next’ to Proceed.

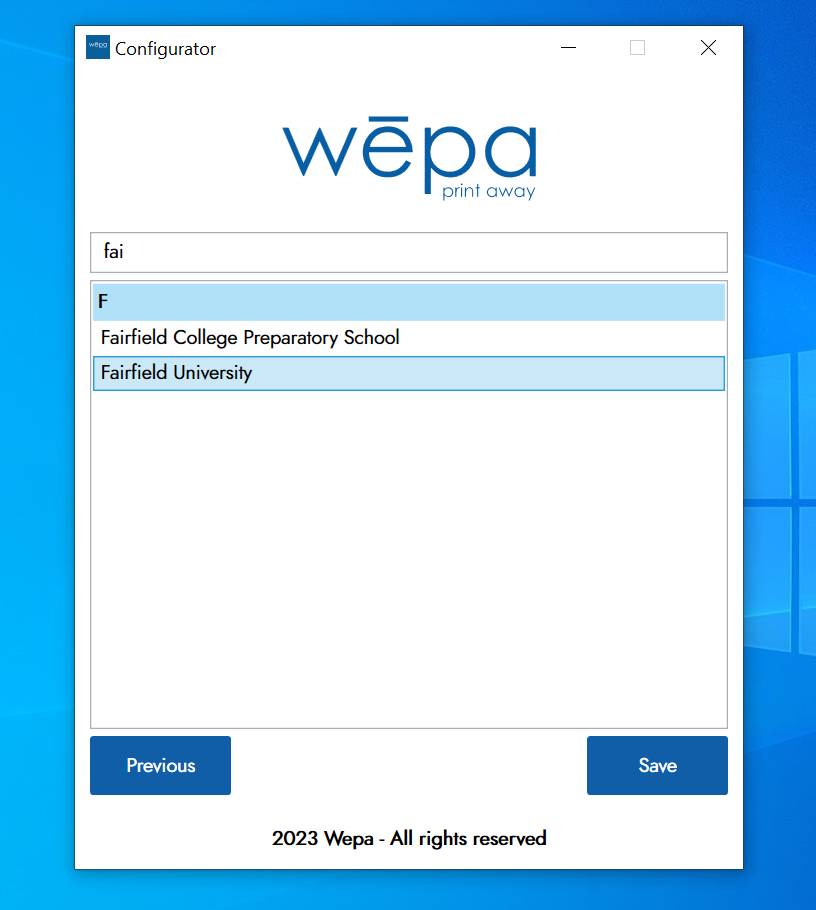
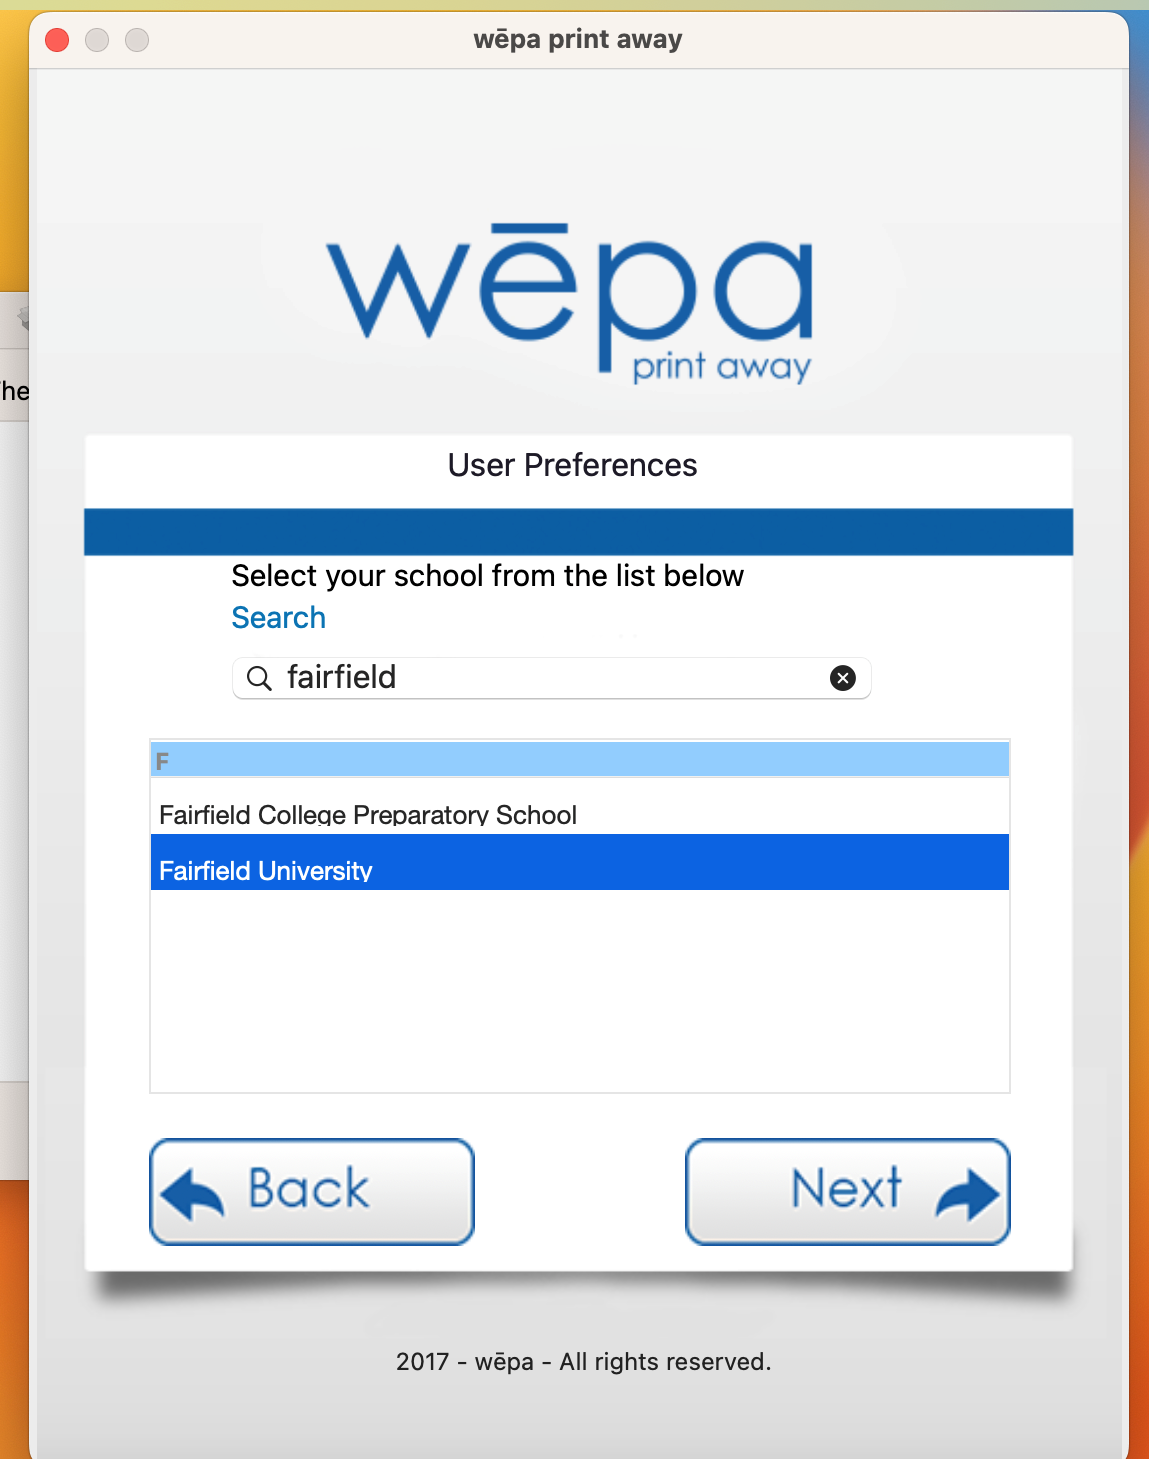
- Select “Fairfield University” as your school, then click ‘Next’ to Proceed.
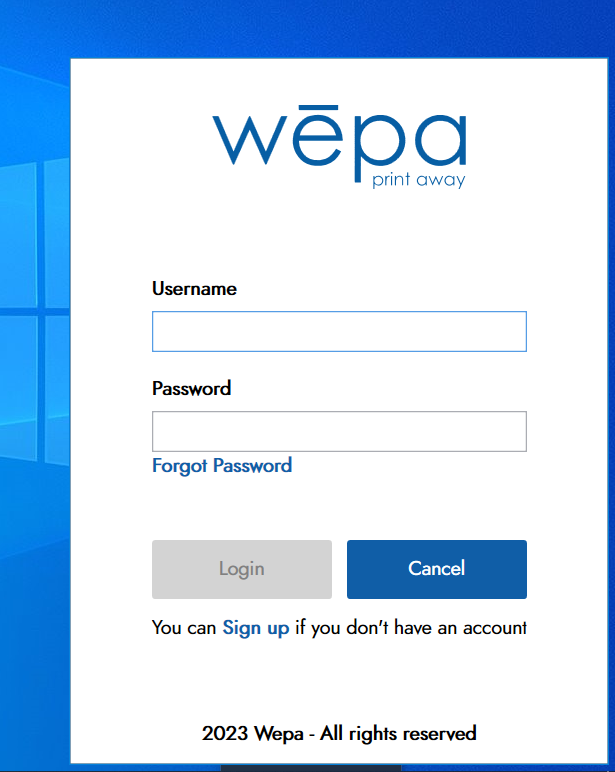
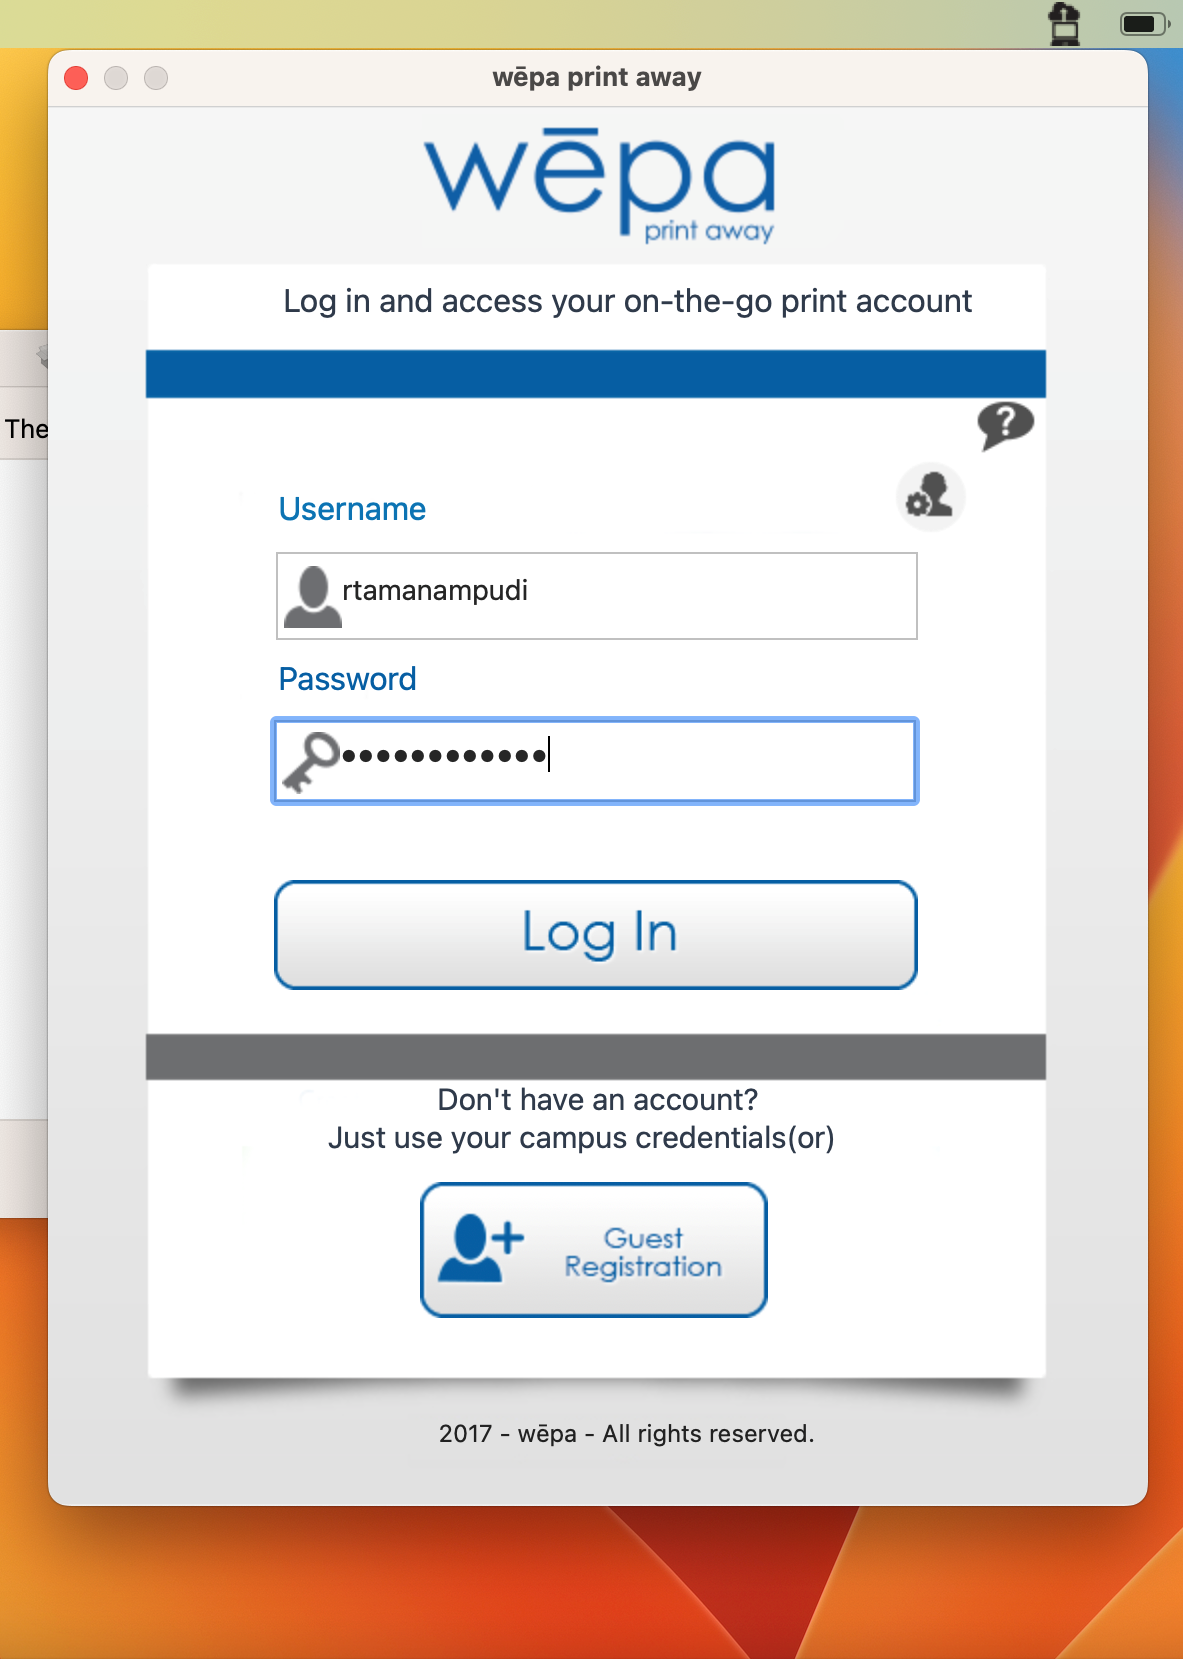
- Enter your NetID and Password, then click ‘Next’ to Proceed.
- Once logged in, you will see a brief overview of wēpa printing.
- You have successfully installed the wēpa print drivers onto your Windows computer.
Mac OS X
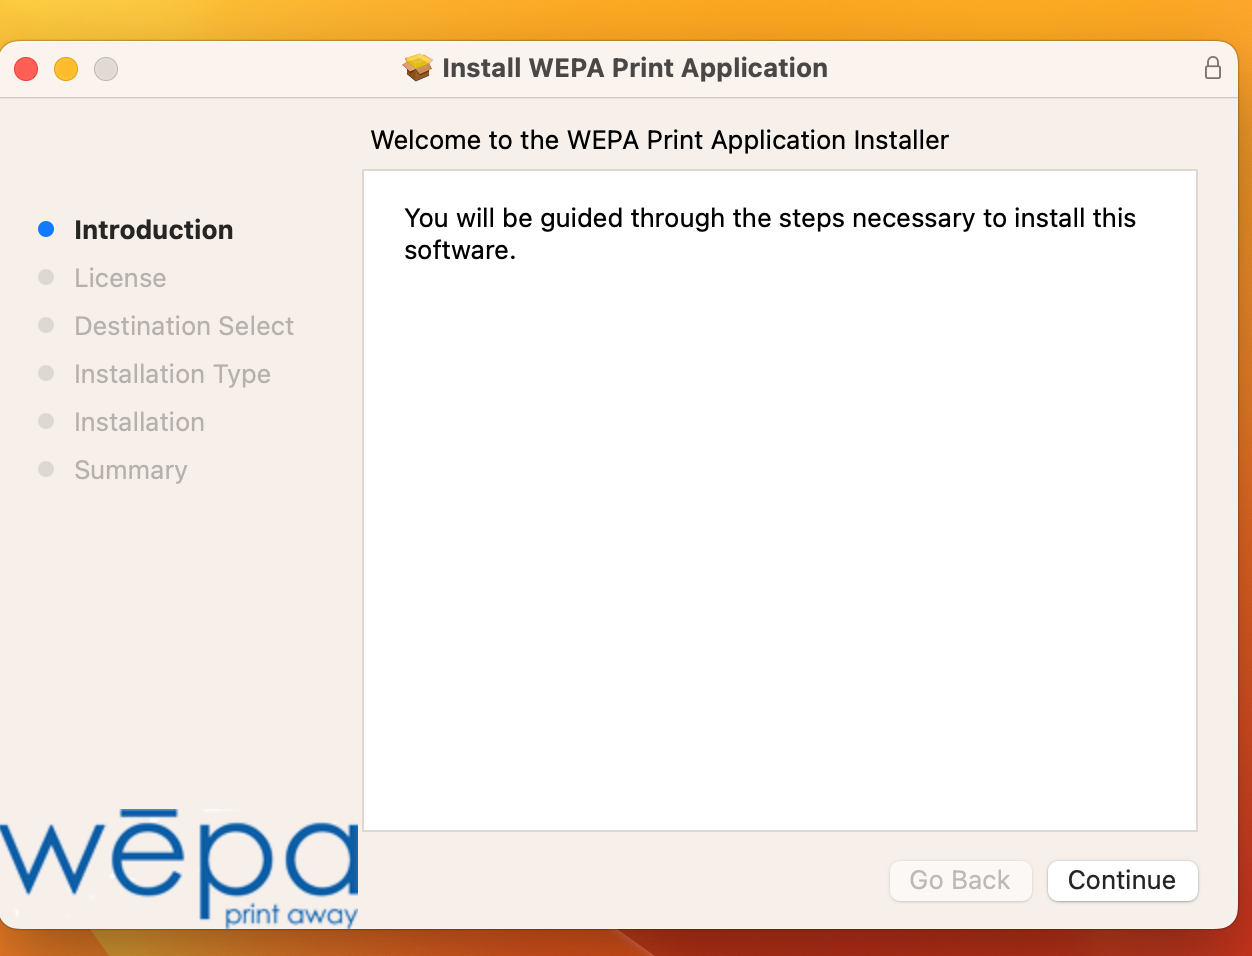
- Open the .pkg file to begin installation. If Gatekeeper is set only to allow from the Mac App Store, right click or control click the .pkg installer to bring up the context menu, select Open, then click Open on the warning dialog. Press “Continue” and proceed through the installation steps.
- After the installation process completes, the Mac Print App will automatically launch. Select either ‘Student’, then click ‘Next’ to Proceed.
- Select “Fairfield University” as your school, then click ‘Next’ to Proceed
- Enter your NetID and Password, then click ‘Next’ to Proceed.
- Once logged in, you will see a brief overview of wēpa printing.
You have successfully installed the wēpa print drivers onto your Mac OS X computer.
Contact the ITS Help Desk in the Library Room 230 or at (203) 254-4069 for assistance.