Kaltura and Blackboard
Kaltura is a video streaming tool used for managing videos for University purposes ranging from sharing a digitized film (in accordance with the TEACH Act) to publishing introduction videos to sharing tutorials. This page is an introduction to Kaltura through Blackboard.
Upload and Manage Your Videos Through Kaltura My Media
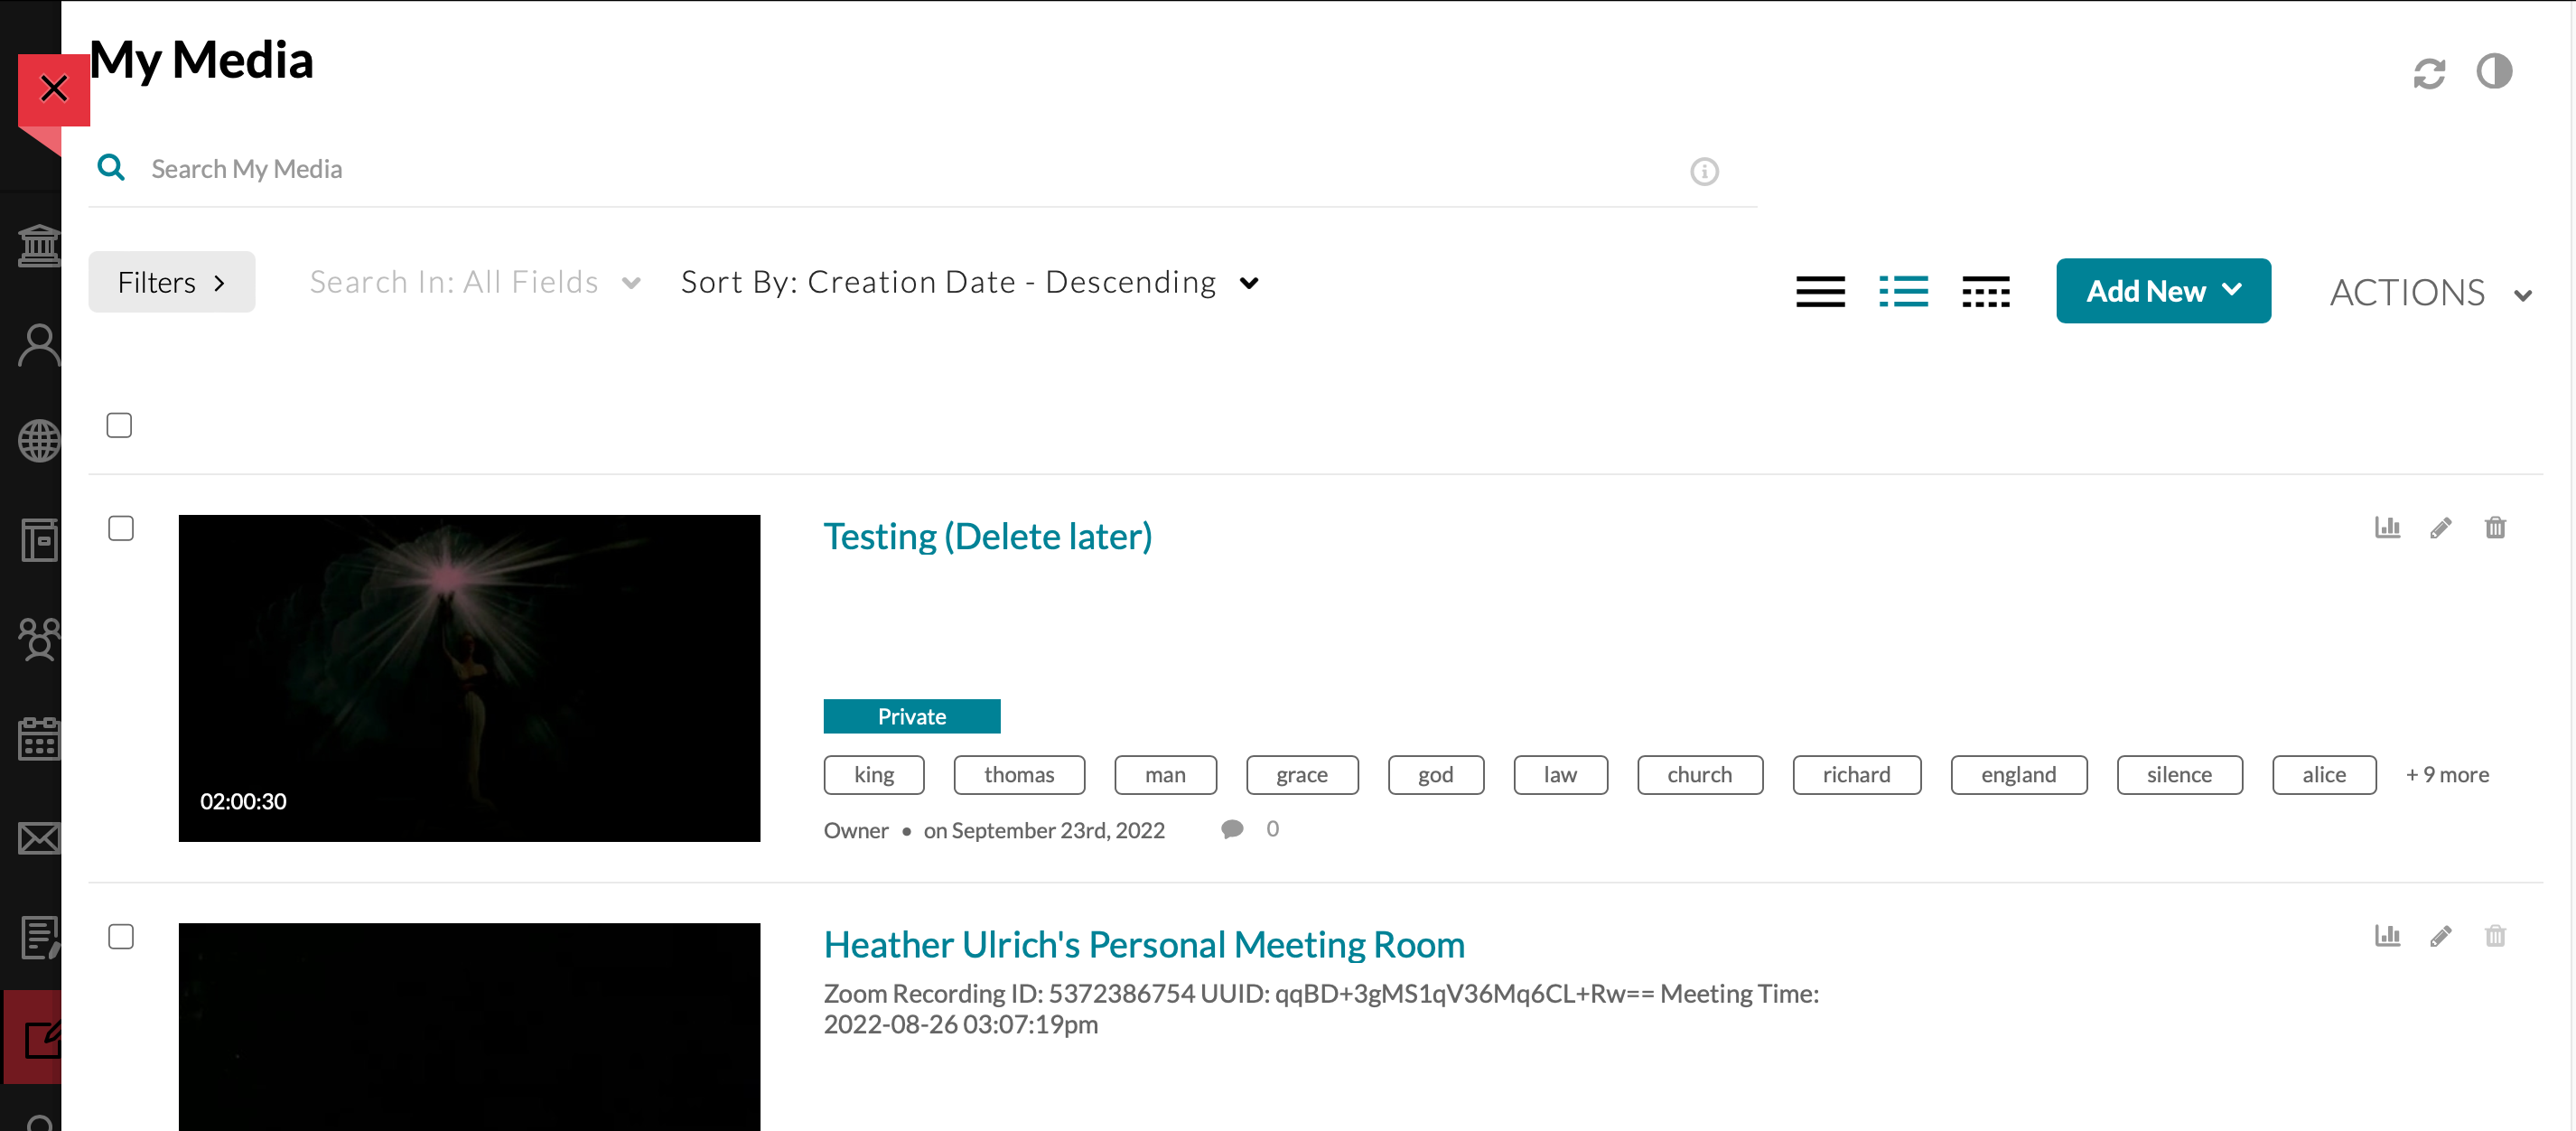
Through Kaltura My Media, you can upload or delete your own content (such as locally saved Zoom recordings), request ASR captions in various languages, create video quizzes, and more. Kaltura My Media can be accessed through the Tools area of Blackboard’s base navigation, or through the Course Tools area of your course menu.
Access Kaltura My Media through Blackboard's Base Navigation
Below are the steps to access it through Blackboard’s base navigation.
- Log in to Blackboard at fairfield.blackboard.com
- Go to Tools in the base navigation
- Choose Kaltura My Media
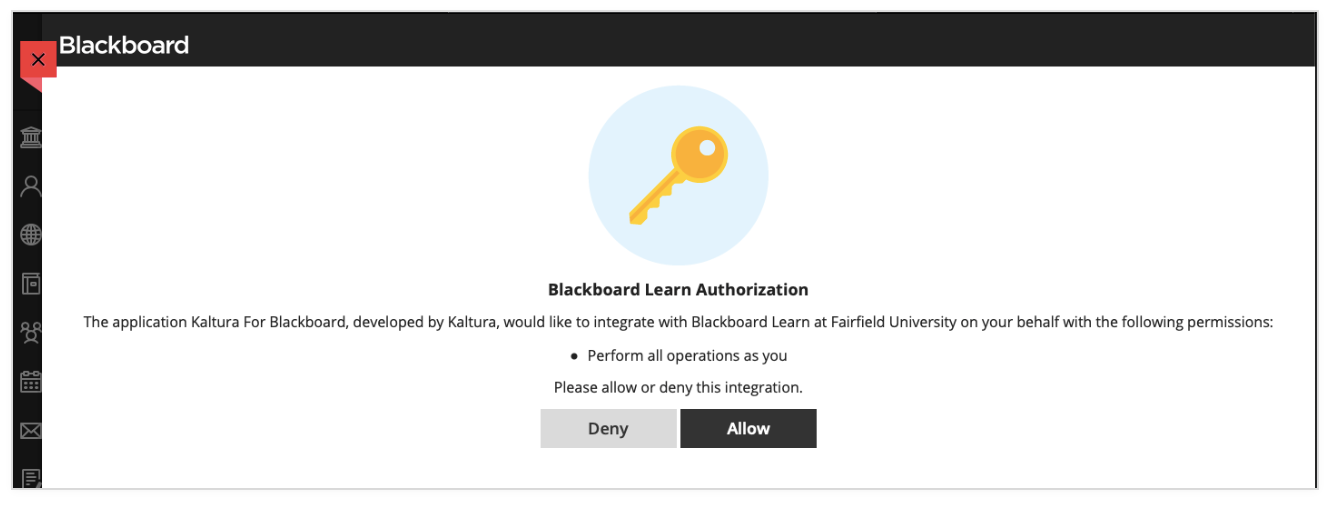
The first time you open this module you will need to Allow this Integration.
If you are using Chrome to access Kaltura My Media for the first time, you may encounter an error message instead of the Blackboard Learn Authorization message. If this occurs, please use another browser to allow the integration. After the integration has been allowed once, you should be able to resume using Chrome for all future tasks in Kaltura My Media.
Upload Videos to Kaltura through Kaltura My Media
- Select Add New in the top right; then select Media Upload
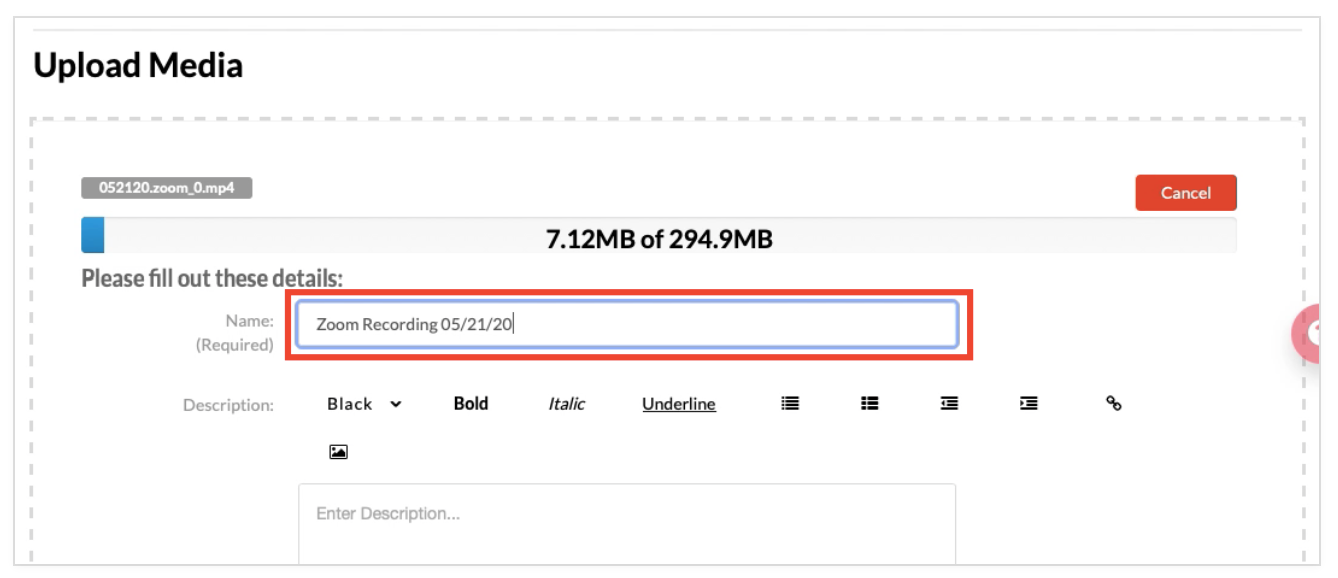
- Choose a file to upload
- Provide a descriptive title. This will be useful later on if you re-use the video in another class or for a video quiz.
- Optional: Provide a description
- Optional: Provide a description
- After the video has fully uploaded, choose Save.
- Select Go To Media to view the Video Editing screen to update the metadata or captions, or choose Go To My Media to view your full My Media collection. Please note that all videos are automatically captioned in English. You can request new captions or edit the English captions after they have finished processing (about 30 minutes after the video is in “Ready” status). See Request Captions on this page for more information.
Publish Content to a Course Media Gallery
Faculty Only: When a video is embedded from the Kaltura mashup tool into a course content area it is automatically published the course Media Gallery. Benefits of publishing to the course Media Gallery from My Media first include minimizing the time spent searching for a particular video, as you can embed videos from the Media Gallery using the Kaltura Media Mashup tool.
- Check the checkbox next to any videos you want published in one or more courses. Then, choose Actions in the top right and Publish.
- On the next screen, select the course(s) or organization(s) the video(s) should be published in.
- Now that the films have been published to your course gallery, you will be able to easily find them when using the Kaltura Mashup tool to Embed Existing Kaltura Content (Including Feature Films) in a content area.
Request New and/or Edit Captions
All videos uploaded to Kaltura are automatically captioned in English. The following guide will walk you through requesting captions in another language and editing your existing captions.
Requesting Captions
If you upload a video that is not spoken in English, you may want to followed these steps to access the caption tool and remove the English captions, as well as request captions in the spoken language.
- Select the check box next to the video(s) you need captions for.
- Choose Actions in the top right, then Caption & Enrich
- On the Order Captions & Enrichment Services screen, select the language the video is recorded in (the default selection is English).
- Select Submit.
- Supported languages include English, French, German, Italian, and Spanish. Contact Academic Computing if you have a need for additional language support.
- There is a 30 minute turnaround time for most videos and the video player will be updated to display captions as soon as they are available.
Editing Captions
It is recommended that you review the captions for all videos once they have finished processing, particularly if your video uses terminology specific to your discipline.
- Select the check box next to the video(s) you need captions for.
- Choose Actions in the top right, then Caption & Enrich
- On the Order Captions & Enrichment Services screen, select the Edit button to the right of the captions under Existing Requests.
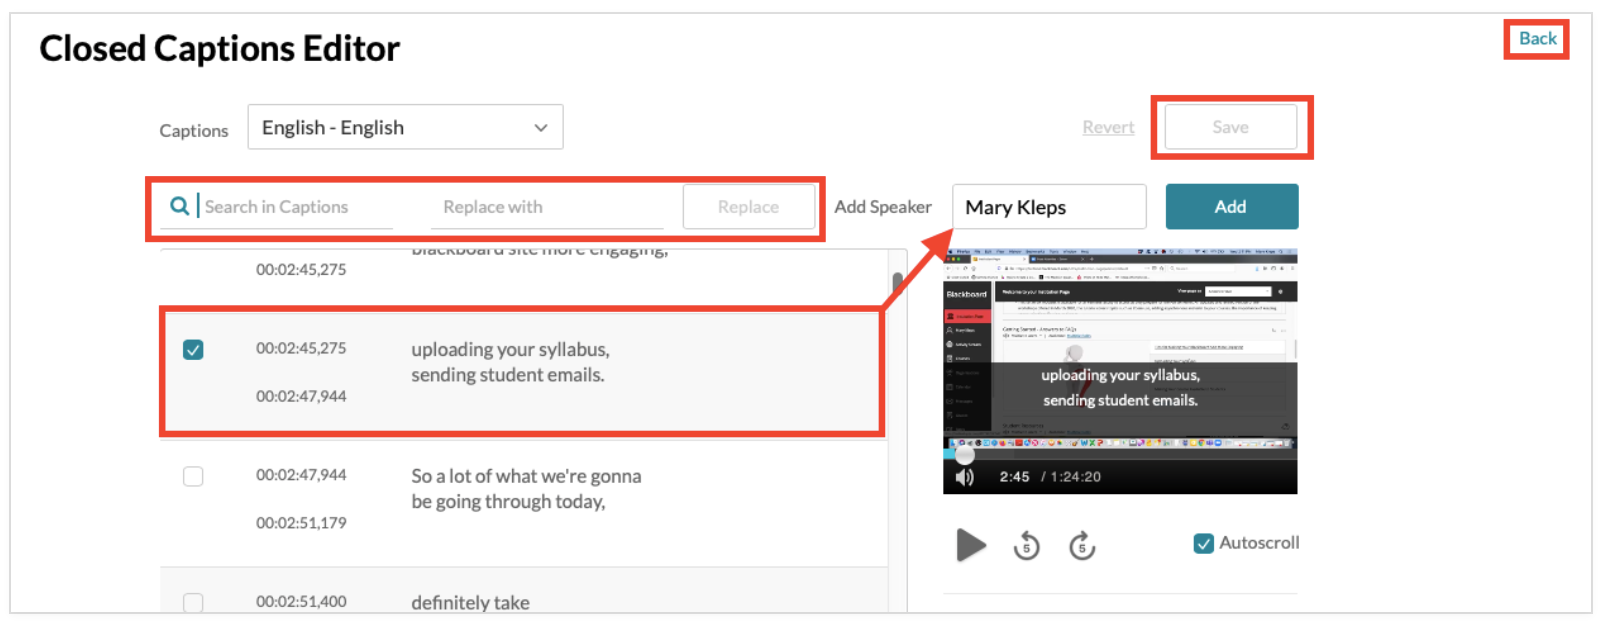
- In the caption editor, you can:
- Edit captions - Simply click into any caption and begin typing or deleting the existing text.
- Search and Replace words or phrases - enter the word or phrase the captioning software misunderstood and then replace it with the correct word or phrase.
- Assign a speaker - This is especially useful in recorded meetings with multiple speakers. Check the box to the left of every caption file that one particular person spoke, enter their name in the Speaker box, and then choose Add. Repeat for each speaker.
- Choose Save to save your work, and Back when you are ready to return to your My Media.
Record A Video Within Your Browser
Kaltura Express Capture is a pared-down, quick-recording option that you can use with the click of a button. It allows you to record video directly within your internet browser using your webcam and microphone. After recording and saving your video, it will be uploaded into your My Media page without needing to install any additional programs or hardware.
Recording video using Express Capture
- Navigate to Kaltura My Media.
- Click the Add New button in the upper right of the screen.
Select the Express Capture option.*
Your browser may require you to authorize the use of your webcam and mic. Select the desired devices from the drop-down menus and click Allow.
You can also adjust which audio and video source Express Capture is using by clicking the gear icon in the upper right hand corner of the screen.
Click the red record button in the bottom-center of the video preview to begin your recording.
The preview will present a three-second countdown until it begins recording video. Express Capture will show a timer displaying how long your recording has been running.
- When you are finished, click the square stop button next to the timer to end the recording.
- You will be presented with three options below the preview screen.
- Record Again: delete the recording and start the process over again.
- Download a Copy: save a copy of the video to your local device.
- Use This: begin the process of saving the video to your My Media page.
- Once you have opted to save your recording to Kaltura, your video will begin automatically uploading to your My Media page.
- On the next screen, enter a name and description (optional).
- Save.
Related articles
Related content
Contact the ITS Help Desk in the Library Room 230 or at (203) 254-4069 for assistance.


